I love Easter festivities from dressing our kids up in their Easter outfits to Easter baskets to treats. Today I wanted to share with you three creative Easter projects you can try in your house for this year’s festivities that have been a hit in our home over the years.
Add an Easter Surprise to Your Cupcakes
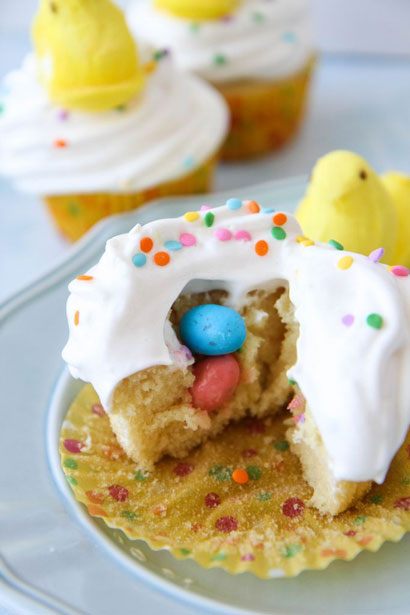
Surprise your kids with a fun Easter surprise in the center of their cupcakes. Using a simple cake mix (we chose a gluten-free cake mix for our family) prepare your cupcakes as directed on the packaging and allow them to cool fully.

Utilizing a simple melon baller tool or apple corer, hollow out the center and fill it with Easter candies and sprinkles for a surprise that your kids will love!
I love the combo of eggs and Peeps since it looks like a Peep hatched some eggs in our cupcakes. I guarantee it is a good one to get a belly laugh out of your kiddos.
Try a New Technique with Your Easter Eggs
Every year we have tried something new with our Easter eggs from marbleizing them to painting them to dying with drink mixes. Last year we discovered plastic eggs that look like real eggs over in the Easter aisles. These eggs are more durable than dying real eggs and can handle the abuse from little hands. We utilized egg painting kits to create vibrant eggs and found that some of our prettiest eggs were created simply from paint that was on our fingertips for a beautiful mottled appearance to our eggs. The best part about these is that they can be brought out every year and be a part of your holiday decorating, unlike real eggs that need to be eaten or thrown out!
For another fun technique, we have found that Kool-Aid yields vibrant colors and dye much quicker and with bolder colors than traditional dye mixes. Simply add one cup of cold water to one package of your drink mix and dip your eggs into the beautifully colored bath. You can also add a creative detail by wrapping your eggs with rubber bands to create a beautiful stripe of white to break up the color.
If you have impatient little ones, Kool-Aid dying is the way to go because the vibrant colors take only seconds to adhere to the egg shells! We have found this is a good option particularly with busy toddlers.
Add a Festive Touch to Your Home
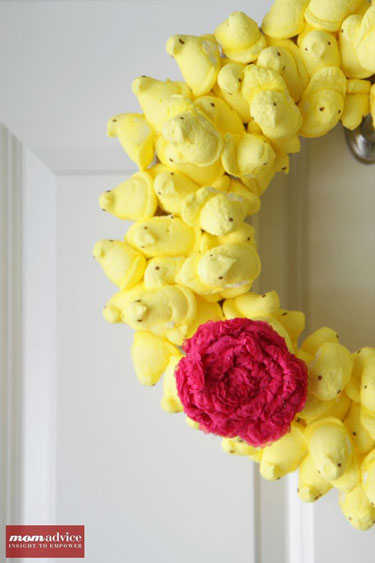
Three years ago I made a Peep wreath for our home and it is STILL going strong. Can you believe that? I used a 14” straw wreath and 12 packages of Peeps to make this wreath.
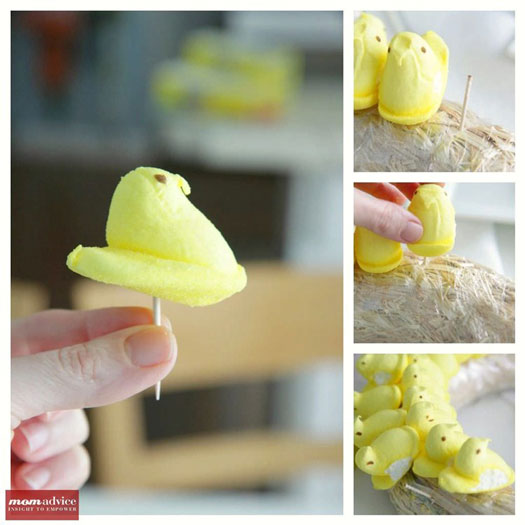
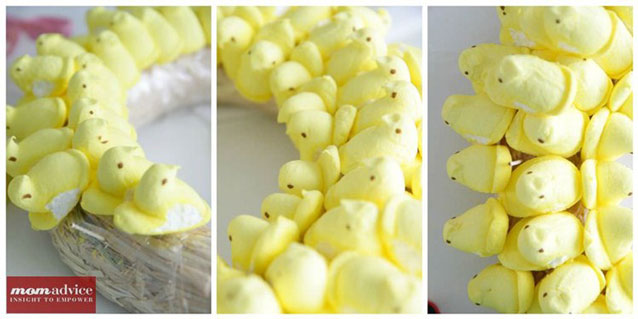
I simply took a toothpick and attached it underneath to the Peep and then poked it into the wreath to secure. You can also add a little hot glue underneath if you want to make sure that the Peep stays in and is stable. Repeat applying the Peeps, going all the way around until you have three layers that cover your wreath. You can finish this with a bow or ribbon in a festive color.
The Peeps harden within just a few hours and there aren’t any molding issues at all. You do want to make sure you have this in a shady spot in your home and not in full sun since these little guys will probably melt and fall off. As I said, our wreath has been going strong for three years, to the amazement and delight of our whole family! I also love the bright pop of yellow it brings to our home.

I hope these ideas inspire you for your Easter celebrations this year and you have found a new creative way to celebrate the holiday! Happy Easter, everyone!